As you might already know, when it comes to clay I am a hand-builder. I learned how to throw many moons ago, but it is hand building that speaks to me. I’ve been thinking about adding mugs to my list of functional items, but I wasn’t quite loving what I was creating. In order for it to happen, I would need to create a collaboration with another ceramic artist. Enter Thomas Graeper.
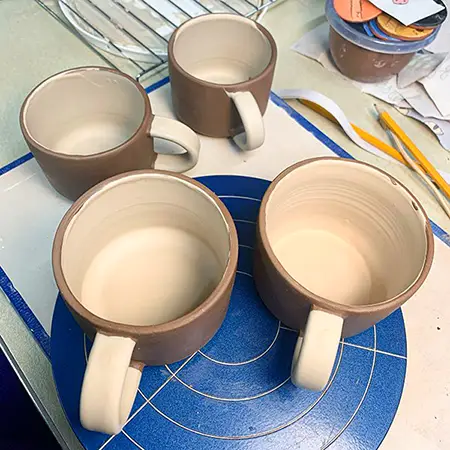
He recently dropped by to visit with my son and they popped into the studio and we talked clay – of course! Realizing he has been throwing mugs for a number of years, I shared my idea of creating a collaboration: Thomas would throw the mugs and I would decorate and fire them. He liked the idea and brought over several different styles of mugs he has made. It was a hard choice to make for I really loved not only their aesthetics but also how they felt in the hand. We decided upon a smaller mug first, one that easily stacked together as two mugs. With cupboard space being at a premium for many folks, we thought this would be good idea.
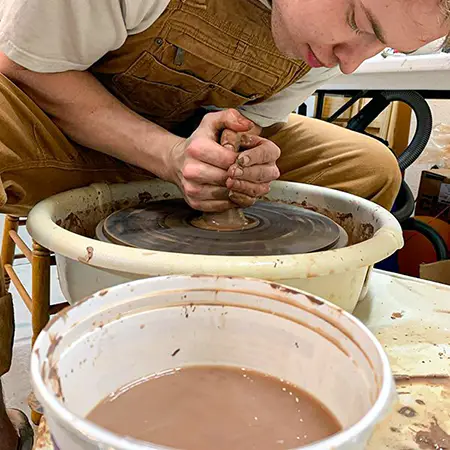
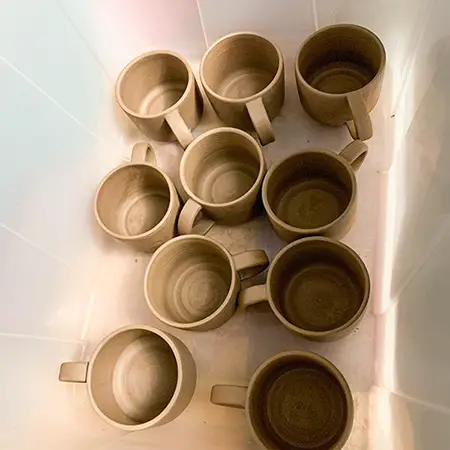
Thomas set to work on throwing the mugs, pulling handles, and attaching the two. When they were ready for me, I placed them into the damp box to firm up a bit more and to give me time to create some new decorative designs.
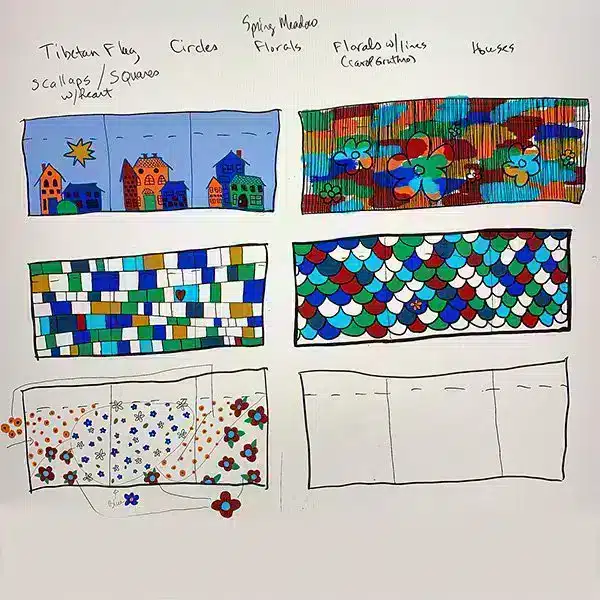
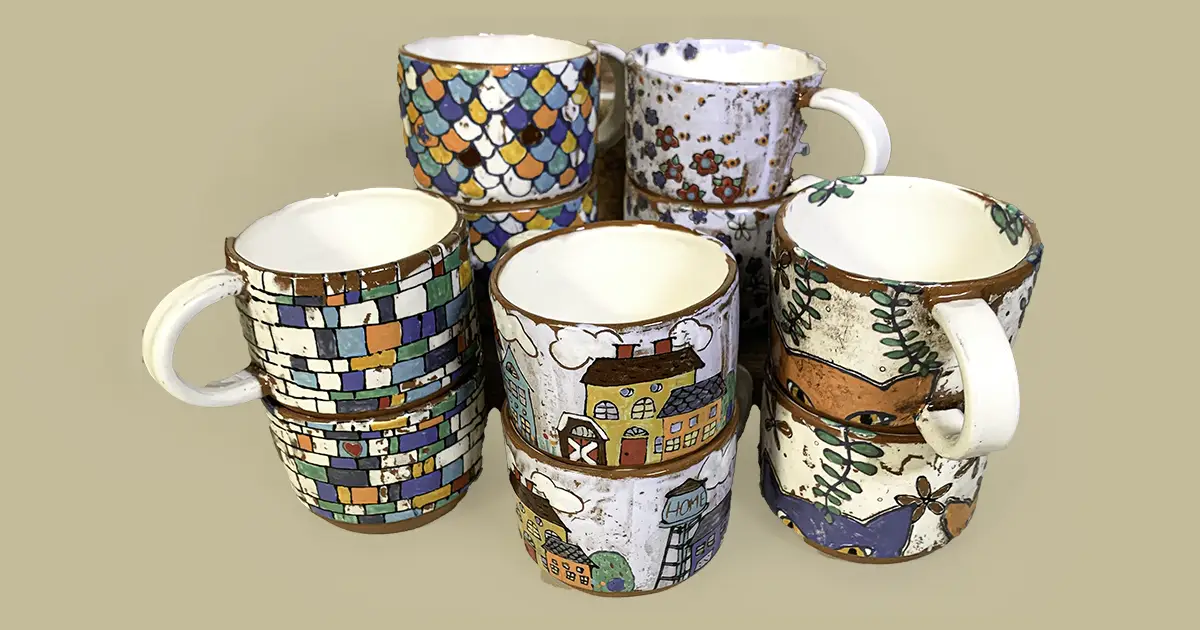
I decided to make 5 new designs for 10 mugs, 2 mugs for each design. Once I had my sketches I set to prep each mug. Since I was working with a red clay body, I wanted to brighten the interior with a white slip. Along the same lines, I thought it would be a nice contrast to have the handles white too.
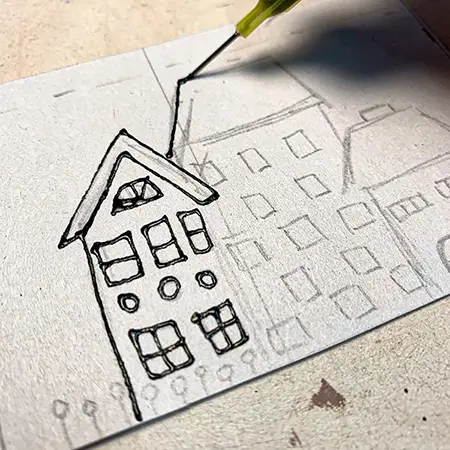
The next step was to create the mono-print for each mug. First I applied the outline of the shapes or areas I would eventually add underglazes.
When all the layers of underglaze had been painted onto the newsprint, I began the transfer process. You can see a shortened version (under 1 minute) of this process in the following video.
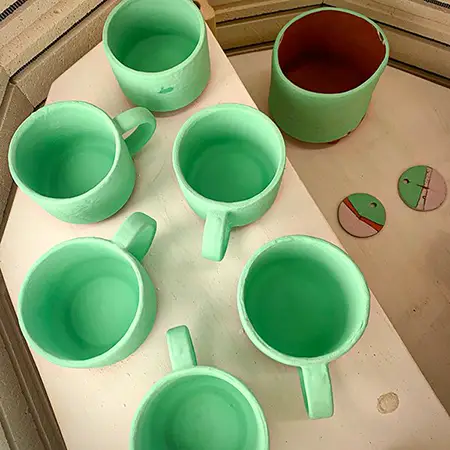
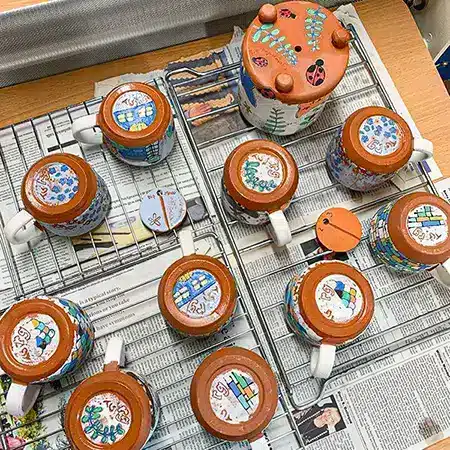
Once the mugs became bone dry I put them into the kiln. After their initial bisque firing I added clear glaze (which appears green prior to firing) to the interior, partial sides and bottom. Then back to the kiln they go.
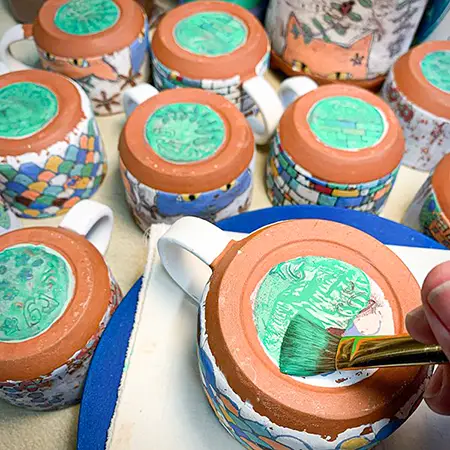
The last step of their making is to be sure their bottoms are smooth to the touch by giving each a sanding. Then I give them an overall washing. Here they are drying.
Final results can be seen in this stop-motion video: